If You Want To Learn Astrophotography, Read This!
🎙️ WE GOT TO TALK ASTROPHOTOGRAPHY ON ESPN RADIO! 🎙️
Right after a man who traveled 7 million miles (astronaut William G. Gregory), astrophotographer Peter Zelinka and I were lucky enough to be the next guests interviewed on ESPN radio!
We got to talk about space, too! 🤓🔭
Have a listen, below! (Or keep reading for the highlights 😉)
The coolest part of the interview was definitely surprising everyone with just how easy it is / how little gear you need to capture an amazing “Deep Space Object” (also called “DSO’s”) like the gorgeous and fairly popular Orion Nebula, the staggering Andromeda Galaxy and more.

Andromeda Galaxy © Peter Zelinka
Okay, so it’s not that easy to capture these targets, but it is not that hard either. Let me explain:
If you’re already a photographer who has the below gear, you have 90% of what you need to capture astrophotography!
Tripod
Camera body that’s decent with noise
Telephoto lens (70-200mm is OK, but a 150-600mm is ideal!)
Cable trigger
Additional required gear to take an astrophotograph:
All you need additionally is a “star-tracker,” also known as an “equatorial mount”. Peter and I recommend either the iOptron Sky-Guider Pro or the Sky-Watcher Star Adventurer, but definitely check out Peter’s perfectly detailed yet succinct and digestible write-up on these star-trackers, and the accessory packages that are needed with them (no ‘big deal’ accessories, just a counter-weight to help balance things, a bracket, etc). Fret not, these companies usually sell the tracker with accessories in one succinct package, around $400 total.

Sky-Watcher Star Adventurer offered by High Point Scientific (the astro retailer we recommend 😉). PS: I (Marisa) went with Sky-Watcher, Peter has the iOptron. Either is great! Can’t decide? Pick a color: red or green, ha! Red = iOptron, Green = Sky-Watcher.
Now, HOW to actually take the astrophotograph
Of course, once you have the star-tracker, you’ll need to take some other steps to actually get to the point of being able to capture these DSOs (also called “targets”):
(disclaimer: these steps are going to sound vague, but I explain them in better detail directly below the list)
You’ll learn how to set the device up with your camera
You’ll learn how to target the DSOs you’re looking for (time of year, time of night, where in the sky, etc), and set up the camera and tracker accordingly
You’ll learn how to properly post-process the files from your camera and turn them into gorgeous, jaw-dropping astrophotographs that actually stand out and aren’t just some faint blur
For all three of the above steps, you can find online courses or attend an in-person, small-group astrophotography workshop (our next one is in Florida in Nov 2019, with two spots left as of Oct 2019).
Chances are, if you google “astrophotography for beginners,” “how to photograph Orion” or the like, my buddy and business partner Peter Zelinka will pull up first. His YouTube channel teaches thousands of people all over the world how to capture DSOs in incredible detail, and Peter just does it so clearly and simply that I firmly believe he is the absolute best out there.
I know this all because I went through this exact process that you are about to embark on. I started with some mild interest in astrophotography, then some serious desire, and googled my way through the process to where I am now, taking astrophotographs and all.
Peter’s 12-series course is only $100, and breaks down every last step in digestible, small (not daunting!) little nuggets. I’m going to emphasize the word DIGESTIBLE again—cannot stress that enough. I had literally zero experience with astrophotography, and watched Peter’s free YouTube overview on the particular tracker I bought. I found it so manageable that I then purchased his Deep Space Astrophotography online course for $100, and watched the first video for targeting Orion. All in all, that tracker overview YouTube and Orion video took me about 45 mins total of video-watching, then I was headed out under the stars. What happened next? Directly below, take a look at my very first Orion photograph on the left, and Peter’s more experienced one on the right.
My very first astrophotograph ever taken (after watching only 45 mins of tutorials)
on the RIGHT, take a look at my inexperienced, very first astrophotograph. On the LEFT, you’ll see astro pro Peter’s image of the same target (Orion Nebula).
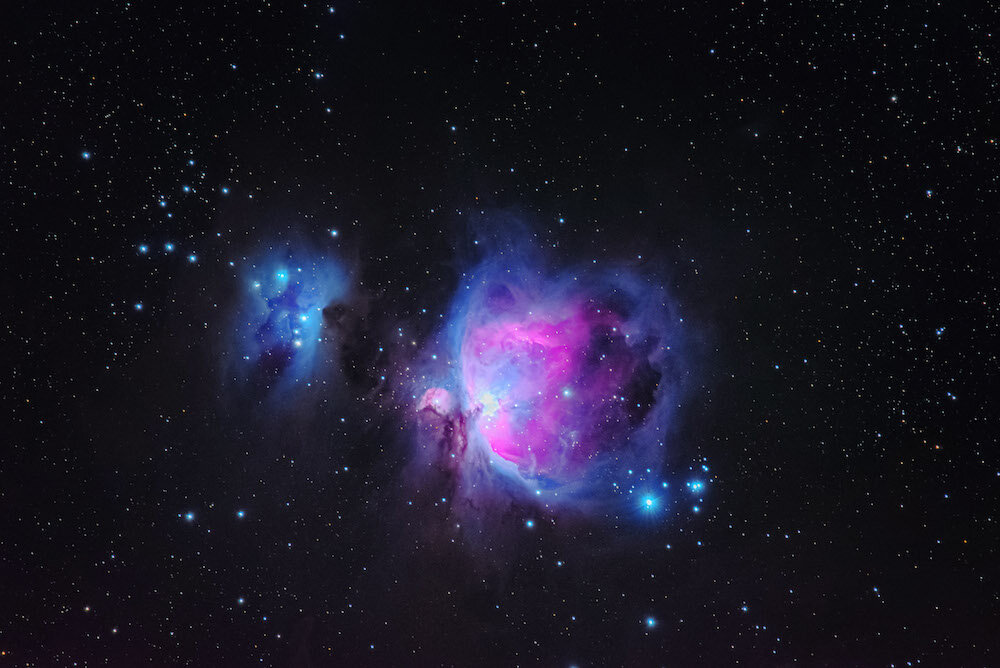
Astro Pro Peter Zelinka’s Orion Photograph © Peter Zelinka

My very first photograph of Orion (after only 45 mins of tutorials) from back in the day! © Marisa Marulli
Come out and shoot the ✨ with us!
As the founder of Further Photo Expeditions, I promptly reached out to Peter right away to ask if he wanted to put together an in-person, more experiential expedition, teaching people how to capture these things (or better their skills in doing so). And so, we found ourselves one of the darkest sky locations around, some warm winter weather, and put together The Night Skies of Kissimmee Prairie - a deep space astrophotography course that includes 3 nights of guided shooting in-the-field (that means you… actually… capturing… targets, people!!), with 3 days of classroom and post-processing lessons, transportation and more all figured out!
The rest is history (unless you’re on another planet looking at ours 👩🏼🚀🌎, then, this writeup is in your future)! Nerd comment of the day ✅🤓🔭📷✨
Check out our available expeditions and join us sometime, won’t ya!
-Marisa